At a glance
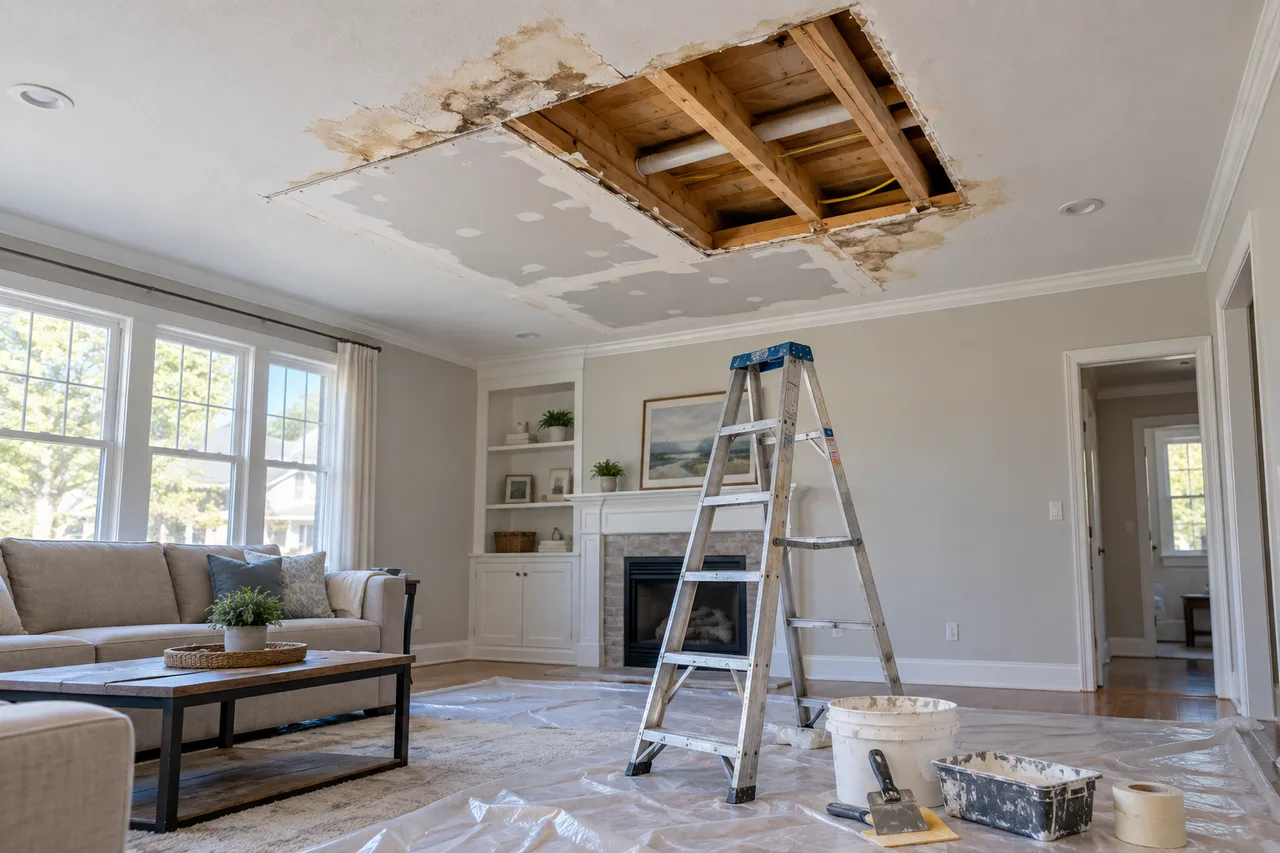
Ceiling water damage repair addresses affected overhead materials after the water source has been investigated and appropriate drying completed. It may involve retaining sound material, replacing damaged sections and restoring the finish. Painting a stain alone is not a repair of an active leak or weakened ceiling.
Read the visible problem without assuming the cause
A ceiling stain can suggest where water collected, but it does not identify the complete path or the condition of every layer above it. Tell the contractor whether the mark appeared after rain, use of an upstairs bathroom, an appliance event or an unrelated incident. These observations can help organize an investigation, but they are not a substitute for checking the actual source.
Keep clear of bulging, sagging or falling material and water near a light fitting. Do not puncture a water-filled ceiling or remove a fixture to investigate it yourself. Describe the concern from a safe location and ask whether an electrician, plumber, roofer or other appropriate professional must assess it before ceiling work. A contractor should not judge structural safety solely from a small photograph.
Identify the rooms above and beside the damage, if known, and any earlier repairs to the same location. Note whether a source repair has already been completed and who performed it. Ask the ceiling contractor what evidence it needs before closing the affected area. A dry-looking stain and a verbal statement that a leak was fixed may not be enough to establish that the concealed assembly is ready for finishing.
Coordinate the leak repair with ceiling work
Ceiling repair and source correction should have separate, explicit owners. A drywall contractor might restore the surface but not repair roofing, plumbing or an appliance connection. Ask whether the proposed price includes source investigation, actual source repair or only the ceiling materials. If multiple trades are involved, confirm who schedules the sequence and who checks the handover between them.
Before work starts, discuss access to the room above, attic or other relevant space. Access may require authorization from another occupant or building manager. Confirm whether existing access points can be used and which openings are proposed. Opening a finished surface affects not only inspection but also the eventual repair size, paint boundary and protection of the room underneath.
Keep paperwork from the source repair, including the location and description of work. Share it with the ceiling contractor and ask whether any further investigation is recommended. If the leak source remains uncertain, clarify how that uncertainty changes the scope and whether cosmetic work should wait. The goal is an agreed sequence, not an assumption that completing the visible ceiling automatically resolves the original water problem.
When a ceiling can be patched and when it cannot
A stain with sound surrounding material can lead to a different repair from a ceiling that is soft, bowed, separating or shedding pieces. The overhead position matters: deterioration that might be noticed by touch on a wall can create a falling-material hazard on a ceiling. Stay out from beneath a bulge or sag; do not puncture it to release water. Safe access and a material assessment come before deciding the size of a patch.
The assessment needs to consider the layers above the finish, not just the painted face. Wet insulation or damaged board can remain hidden between joists. Water from an upstairs fixture may travel before reaching the visible stain. Removing an unsound section makes access possible, but demolition is not a substitute for identifying and correcting the leak. A small stain is neither proof of a small repair nor a reason to replace the whole room without supporting findings.
A patch needs secure support, compatible board and a finish boundary that can actually be restored. Where the existing assembly has special acoustic or fire-resistance requirements, replacement details must preserve the relevant function rather than substituting whatever board is available. Old coatings and unknown textured finishes can need a separate hazardous-material assessment before disturbance. The final choice depends on observed condition, exposure, assembly requirements and access; a photograph cannot settle those questions.
Protect the room and agree on access
Overhead work affects the space below it. Discuss how furniture, flooring, nearby walls and stored belongings will be protected and whether the homeowner must clear the room before arrival. Identify items that cannot be moved easily and ask whether their handling is included. Protection and final cleanup should appear in the scope rather than being assumed from the word repair.
Ceiling height, stairs and obstructions can change the access equipment and labor required. Mention a stairwell ceiling, high entryway or fitted cabinetry when requesting an assessment. Confirm whether the room will be closed during removal, drying or finishing and what route workers will use. For a shared building, ask who arranges access notices and any necessary permission from the property manager.
Clarify the practical schedule by stage rather than accepting a single arrival-to-completion promise. Investigation, drying assessment, board work and decorative finishing may involve separate visits. Ask which stage requires your presence, who will contact you when the area can be used and what conditions could change the schedule. These details help you plan around disruption without pressuring the contractor to cover material before it is ready.
Why stain blocking, texture and repainting are separate tasks
Paint does not correct an active leak, restore weakened board or dry insulation. Once source correction and material readiness have been established, finishing addresses a different problem: the appearance of the repaired ceiling. Residual discoloration on sound material may require suitable preparation and a compatible stain-blocking coating. That coating is a finishing step, not a treatment for concealed moisture or mold. Applying it too early can make a recurrence harder to notice.
New board and joint compound differ from an aged painted surface. Texture must be blended across a practical boundary, and repaired material needs preparation suited to the intended coating. Even the original paint formula may look different after years of light exposure and cleaning. Side lighting across a broad ceiling can reveal a localized patch that appears acceptable in ordinary overhead lighting. Matching the repair should therefore be considered at normal viewing positions, not just close up.
A localized patch, repainting one ceiling plane and redecorating an entire room are different scopes. Ceiling work may also affect trim, light fixtures or adjacent walls. Keeping these items separate helps explain the price and the finished result. Source investigation, drying, board repair and decoration may require different visits; that sequence is more meaningful than a promise to finish everything in one day. Final inspection should include both the agreed appearance and any outstanding fixture or source-repair responsibilities.
Inspect the handover and keep a recurrence record
At handover, review the repaired area from ordinary viewing positions and compare it with the agreed scope. Ask about incomplete touch-ups, fixture reinstatement and debris removal. Do not move into an excluded or restricted area just to inspect it. If a separate trade must return, record the outstanding task, responsible person and contact arrangement so it is not lost between appointments.
Keep before-and-after photographs taken safely, the repair boundary description and information about the source correction. Ask whether the contractor has material-condition records that should be passed to a later decorator or building owner. These records are useful when the work is staged or when the property changes occupants. They are not a guarantee that a roof, pipe or appliance cannot leak again.
If a mark reappears, record when you noticed it and what was happening, such as rainfall or use of a nearby fixture. Contact the appropriate contractor for reassessment rather than repeatedly covering the stain. A recurring problem may require renewed source investigation or review of adjoining materials. Ceiling repair focuses on the overhead assembly; broader water damage restoration may be needed when walls, floors or several rooms are also affected.
Choose the ceiling task that matches the condition
| Situation or stage | What it addresses | Important limit |
|---|---|---|
| Sound material with a remaining stain | Assessment, appropriate preparation and decorative repair. | A coating cannot establish that a leak is resolved. |
| Soft, sagging or separated board | Safe access and evaluation of removal and replacement. | A cosmetic patch does not restore weakened material. |
| Wet concealed layers | Assessment of insulation, framing and drying access. | The painted surface does not reveal every layer. |
| A recurring mark | Renewed source and adjacent-area investigation. | Repeated repainting can hide a continuing problem. |
Typical work sequence
- Keep people clear of unstable overhead material and electrical concerns.
- Locate and correct the leak through the appropriate trade.
- Assess the ceiling layers and complete necessary removal or drying before closing them.
- Restore board, texture and paint to the agreed boundary; review fixtures and recurrence instructions.
The actual sequence depends on the assessed property and the hired contractor's written scope. These are planning stages, not an appointment or completion-time promise.
When to Discuss Ceiling Water Damage Repair
A stained, bowed or dripping ceiling can involve active moisture above the visible finish. The first step is to stop ongoing water intrusion when possible, document the affected area and determine whether drying, removal or reconstruction is needed.
Signs Your Property May Need Attention
- Brown or yellow ceiling staining
- Sagging drywall or softened texture
- Drips near fixtures, vents or upper-floor plumbing
What the Service May Include
- Moisture checks around the affected ceiling area
- Drying, containment or removal of damaged materials
- Coordination with plumbing, roof or appliance repairs when needed
Benefits of Ceiling Water Damage Repair
- A repair plan can separate the leak investigation, ceiling assessment and finishing work, making responsibilities clearer before the job starts.
- Checking adjoining ceiling sections helps define a repair boundary beyond the most obvious stain.
- Agreed texture and paint requirements make it easier to discuss the expected appearance of the repaired area.
Limitations and Risks
- The ceiling repair contractor may not handle the plumbing, roof or appliance problem above it. Confirm who will correct the source.
- Opening the ceiling may reveal wet insulation or other damage that changes the scope. Texture and paint matching may also require a larger finish area.
- A sagging ceiling or water around a light fixture is a safety concern. Keep clear of the affected area and arrange appropriate assistance.
Questions Before Hiring a Contractor
- Has the water source been stopped?
- Are electrical fixtures or insulation affected?
- Will damaged drywall be dried, removed or replaced?
Costs and Work Terms
Pricing depends on the assessed property, affected materials, urgency, access and the contractor's written scope. Confirm any assessment charge, exclusions, payment terms, license and insurance before approving work.
Frequently Asked Questions
Can a water stain on a ceiling simply be painted over?
A cosmetic finish should follow investigation of the leak and assessment of the material. Paint does not stop water intrusion, and the contractor should explain whether the ceiling can be retained or needs replacement.
Does ceiling repair include fixing the roof or plumbing leak?
Only if the written scope includes that work. Ask whether a plumber, roofer or another specialist is needed and how the ceiling work will be coordinated with the source repair.
What affects the cost of ceiling water damage repair?
Ceiling height, access, affected area, insulation condition, removal requirements and texture or paint matching can all change the price. Confirm protection of furniture and final cleanup as well.
Homeowner Resources
General AI-assisted homeowner guidance published by ClearHaven Restoration, a contractor-connection website, not a restoration contractor. References support the safety, sampling and equipment explanations; they do not certify this website or a contractor. This guide is not a property assessment. How this information is prepared.